DIY decorations for parties offer a fantastic way to personalize celebrations while saving money. From whimsical birthday bashes to elegant wedding receptions, crafting your own decorations allows for unique expression and reflects your personal style. This guide explores diverse themes, materials, techniques, and ideas to transform any gathering into a memorable event, focusing on cost-effective and creative solutions. We’ll cover everything from simple projects for beginners to more advanced techniques for experienced crafters, ensuring there’s inspiration for everyone.
Whether you’re celebrating a birthday, holiday, or wedding, the possibilities are endless. We’ll provide step-by-step instructions, helpful tips, and readily accessible resources to make your DIY decoration journey a fun and rewarding experience. Get ready to unleash your creativity and bring your party vision to life!
Introduction to DIY Party Decorations: DIY Decorations For Parties

Throwing a party is exciting, but the costs can quickly add up. One area where significant savings can be achieved is in decorations. Creating your own party decorations offers a unique opportunity to personalize your event, reflecting your style and the party’s theme while simultaneously reducing expenses. The satisfaction of crafting beautiful decorations yourself adds a special touch, making the entire party planning process more enjoyable.The financial advantages of DIY party decorations are undeniable.
Commercially produced decorations can be surprisingly expensive, especially when considering the quantities needed for a larger gathering. By making your own, you can significantly reduce these costs, often by a substantial margin, freeing up your budget for other aspects of the party, such as food, drinks, or entertainment. For instance, a simple banner purchased from a party supply store might cost $15-$20, whereas the materials to create a similar banner at home – fabric, ribbon, and paint – would likely cost less than $5.
This cost saving becomes even more significant when decorating for larger parties or multiple events.
Party Themes Suitable for DIY Decorations
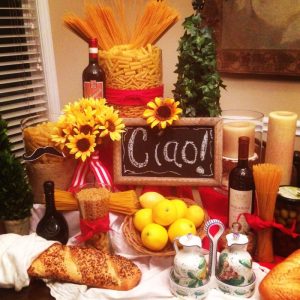
Many party themes lend themselves perfectly to DIY decorations. The creative possibilities are virtually limitless. The success of DIY decorations often hinges on choosing a theme that allows for creative expression using readily available or easily sourced materials.A rustic-themed party, for example, might utilize natural elements like burlap, twine, and wildflowers gathered from a garden or local field to create centerpieces and banners.
Mason jars, painted in muted colors and filled with wildflowers or candles, would make charming table decorations. A whimsical woodland creature theme could involve crafting adorable animal cutouts from felt or cardstock, strung together to create a garland or used as individual place card holders. For a vibrant tropical party, think bright colored tissue paper pom-poms, pineapple-shaped centerpieces made from craft foam, and leis crafted from colorful construction paper.
Even a sophisticated Hollywood glamour theme can be achieved with DIY decorations by using metallic fabrics, feathers, and strategically placed string lights to create a dazzling atmosphere. The key is to choose a theme that inspires your creativity and allows you to utilize inexpensive and readily available materials.
Materials and Tools for DIY Party Decorations
Creating stunning party decorations doesn’t require a hefty budget. With a little creativity and resourcefulness, you can achieve impressive results using readily available and often inexpensive materials. This section will guide you through the essential materials and tools, helping you embark on your DIY decorating journey.
Commonly Used Materials for DIY Party Decorations, DIY decorations for parties
Choosing the right materials is crucial for successful DIY projects. The selection depends largely on your chosen theme and the desired aesthetic. Below is a categorized list of commonly used materials, offering a diverse range of options to suit various styles and budgets.
| Paper | Fabric | Natural Materials | Other Materials |
|---|---|---|---|
| Cardstock (various colors and weights) | Burlap | Twigs and branches | Balloons |
| Construction paper | Ribbon | Flowers (real or artificial) | Streamers |
| Tissue paper | Lace | Leaves | Glitter |
| Wrapping paper | Felt | Pinecones | Plastic containers (for repurposing) |
Essential Tools for DIY Party Decoration Projects
The tools you’ll need will vary depending on the specific DIY project. However, some tools are essential for a wide range of decorative tasks. This table provides a list of commonly used tools and their functions.
| Tool | Purpose and Function | Purchase Information |
|---|---|---|
| Scissors | Cutting paper, fabric, ribbon, and other materials. Essential for precise cuts and shaping. | A good quality pair of sharp scissors with comfortable handles is recommended. Look for scissors designed for crafting or fabric cutting depending on your needs. |
| Hot glue gun | Provides a strong, quick-drying adhesive for attaching various materials. | Choose a hot glue gun with temperature control for better precision and safety. Always use caution when handling hot glue. |
| Hole punch | Creating holes in paper or cardstock for hanging decorations or attaching ribbons. | A standard hole punch is sufficient for most projects, but consider a heavier-duty punch for thicker materials. |
| Tape measure | Accurately measuring materials and spaces for proper sizing and placement of decorations. | A retractable tape measure is convenient and easy to use. |
| X-ACTO knife | Precision cutting for intricate details and clean lines. | Choose an X-ACTO knife with interchangeable blades for versatility and safety. Always use a cutting mat to protect surfaces. |
Sourcing Inexpensive or Recycled Materials
Repurposing and recycling materials significantly reduces costs and environmental impact. Many household items can be transformed into unique and eye-catching decorations. For example, glass jars can become elegant vases, cardboard boxes can be turned into whimsical centerpieces, and old fabric scraps can be used to create festive banners. Thrift stores, garage sales, and recycling centers are excellent sources of inexpensive or free materials.
Consider using leftover wrapping paper, ribbon, or even egg cartons to add texture and visual interest to your decorations. Creativity and resourcefulness are key to transforming discarded items into beautiful party accents.
DIY Decoration Ideas for Different Party Types
Creating unique and memorable party decorations doesn’t require a hefty budget. With a little creativity and some readily available materials, you can transform any party space into a festive wonderland. This section explores diverse DIY decoration ideas tailored to different party themes, providing step-by-step guidance and visual descriptions to inspire your next celebration.
DIY Decoration Ideas for Birthday Parties
Birthday parties call for vibrant and personalized decorations that reflect the celebrant’s personality and age. The following ideas offer diverse approaches to creating a festive atmosphere without breaking the bank.
- Giant Paper Flower Garland: Create a stunning garland using large, colorful paper flowers. Cut various sized circles from colorful cardstock or construction paper. Layer the circles, slightly overlapping, and secure with glue or a brad. String the flowers together with twine or ribbon to form a long garland. This garland can be draped across walls, tables, or even used as a backdrop for photos.
Imagine a vibrant mix of pinks, purples, and yellows, creating a whimsical and cheerful atmosphere.
- Personalized Banner: Design a personalized banner featuring the birthday person’s name, age, or a favorite quote. Cut out large letters from colorful felt, cardstock, or even repurposed fabric scraps. String the letters together with ribbon or twine, adding small decorative elements like pom-poms or glitter. This personalized touch adds a special and heartwarming element to the party.
- Balloon Arch: Create a visually stunning balloon arch using balloons in various colors and sizes. Inflate balloons to different sizes for a more dynamic look. Secure the balloons to a fishing line or sturdy string using balloon clips. Shape the line into an arch and secure the ends to a wall or stand. This creates a fantastic focal point for the party area, adding a pop of color and fun.
- Mason Jar Lanterns: Transform simple mason jars into charming lanterns. Clean and dry the jars. Wrap twine or ribbon around the jars, securing it with glue. Place a battery-operated tea light or LED candle inside each jar for a soft, ambient glow. These can be placed on tables, windowsills, or along walkways to create a magical atmosphere.
Consider using different colored ribbons or twine to match the party theme.
- Photo Booth Backdrop: Create a fun and memorable photo booth backdrop using a large piece of fabric or paper. Decorate the backdrop with streamers, balloons, and other festive elements. Add props like hats, glasses, and funny signs to encourage guests to take creative photos. Consider a theme for the backdrop, like a tropical beach or a superhero scene, to enhance the fun.
DIY Decoration Ideas for Holiday Parties
Holiday parties offer a unique opportunity to showcase festive themes through creative DIY decorations. The following ideas provide inspiration for creating a memorable atmosphere for Christmas, Halloween, or Thanksgiving celebrations.
| Holiday | Decoration Idea | Materials | Steps |
|---|---|---|---|
| Christmas | Pinecone Christmas Trees | Pinecones, green paint, small ornaments, glue | 1. Paint pinecones green. 2. Once dry, glue on small ornaments as decorations. 3. Arrange on a table or mantelpiece. |
| Halloween | Ghostly Garland | White fabric scraps, string, black marker | 1. Cut fabric into ghost shapes. 2. Draw simple faces with a black marker. 3. String the ghosts together to create a garland. |
| Thanksgiving | Leaf Garland | Dried leaves, twine, hole punch | 1. Collect and dry leaves. 2. Punch holes in the leaves. 3. String the leaves together with twine to create a garland. |
DIY Decoration Ideas for Wedding Receptions
Wedding receptions require elegant and sophisticated decorations to create a romantic and memorable ambiance. These ideas offer a balance of visual appeal and practicality.
1. Floral Centerpieces with Mason Jars: Imagine rustic-chic centerpieces using mason jars filled with wildflowers or simple, elegant blooms. The jars can be adorned with burlap ribbon or lace, giving a charming, homespun feel. Vary the height and arrangement of the jars on each table to add visual interest. The wildflowers’ natural beauty complements the simplicity of the jars, creating a relaxed yet elegant atmosphere.
2. DIY Photo Display with Clothespins and Twine: Create a charming photo display by stringing twine across a wall or designated area. Use clothespins to attach photos of the couple throughout their relationship. The clothespins can be decorated with small ribbons or flowers for an added touch of elegance. This personalized display adds a sentimental touch, allowing guests to share in the couple’s journey.
Advanced DIY Decoration Techniques
Taking your party decorations to the next level involves mastering a few advanced techniques. This section explores creating custom banners, personalized party favors, and elaborate centerpieces, elevating your DIY efforts from simple to stunning. These projects utilize readily available materials and techniques accessible to most crafters.
Custom Party Banner Creation
Creating a custom party banner allows for complete personalization, reflecting the party theme and adding a unique touch. The process involves choosing materials, designing the banner layout, and assembling the final product. Consider using materials such as burlap for a rustic theme, bright cardstock for a vibrant celebration, or even repurposed fabric scraps for an eco-friendly approach.The design process begins with sketching your desired layout.
This could involve hand-drawn lettering, simple shapes, or even incorporating photographs. Once the design is finalized, transfer it onto your chosen material using a pencil. Precise cutting is crucial for a professional look. For intricate designs, a craft knife or precision scissors might be necessary. After cutting out the shapes, assemble the banner using string, ribbon, or twine, ensuring even spacing between elements.
You can add embellishments like glitter, paint, or small decorative items to enhance the visual appeal. For instance, a superhero-themed party banner could feature cut-out superhero logos and bright colors, while a wedding banner might use elegant calligraphy and lace accents.
Personalized Party Favor Design and Creation
Personalized party favors demonstrate thoughtful attention to detail and leave a lasting impression on guests. Simple yet effective DIY methods can transform ordinary items into memorable keepsakes. Consider using small jars or boxes as the base for your favors. These can be decorated using paint, washi tape, or fabric scraps, reflecting the party’s theme.Filling the containers is equally important.
Options range from homemade treats like cookies or candies to small, themed gifts such as personalized keychains or miniature succulents. Adding a handwritten tag with each guest’s name creates a personalized touch. For example, for a children’s birthday party, small bags of candy with personalized stickers would be appropriate. A wedding could feature small jars of homemade jam with customized labels.
The key is to choose favors that align with the theme and are practical or enjoyable for the guests.
Elaborate Centerpiece Construction
Centerpieces are focal points that dramatically impact a party’s ambiance. Creating elaborate centerpieces using readily available materials allows for creativity and cost-effectiveness. The construction process begins with selecting a base, such as a tall vase, a decorative bowl, or even a repurposed cake stand.Building upon this base, incorporate a variety of elements to create visual interest and height.
Consider using branches, flowers (real or artificial), candles, ribbons, and other decorative items. The arrangement should be balanced and visually appealing. For a rustic wedding, a centerpiece might feature wildflowers in mason jars, complemented by burlap ribbons and candles. A modern party could use geometric shapes and metallic accents, incorporating sleek vases and minimalist floral arrangements.
The key is to create a cohesive and visually stunning centerpiece that complements the overall party theme and décor.
Creative DIY Decoration Ideas Using Recycled Materials
Repurposing materials for party decorations offers a sustainable and cost-effective approach to creating a festive atmosphere. This section explores diverse ideas, transforming discarded items into unique and eye-catching decorations, reducing waste and adding a personal touch to your celebrations.
Using recycled materials offers a unique opportunity to create personalized and eco-friendly party decorations. The following examples showcase the versatility of common recycled items.
Recycled Glass Jars as Decorative Elements
Glass jars, commonly found in households, are versatile containers perfect for various decorative purposes. Their transparent nature allows for creative displays, while their sturdy build ensures durability.
- Fairy Lights in Jars: Clean and dry various sized glass jars. Place battery-operated fairy lights inside each jar, creating a warm and ambient glow. You can add embellishments like ribbons or paint to personalize them. Arrange them on tables or shelves for a magical ambiance.
- Flower Vases: Decorate clean glass jars with paint, fabric scraps, or twine. Fill them with fresh or artificial flowers, creating elegant centerpieces or table decorations. Vary jar sizes and flower types for visual interest.
- Personalized Candle Holders: Decorate jars with stencils, decoupage, or paint to create personalized candle holders. Use tea lights or small candles for a warm and inviting atmosphere. Consider adding small decorative elements like beads or glitter.
Cardboard Boxes: Versatile Party Decor
Cardboard boxes, often discarded after deliveries, are surprisingly versatile for crafting party decorations. Their structural integrity and large surface area lend themselves to creative transformations.
- Giant Cardboard Flowers: Cut various sizes of cardboard circles from large boxes. Layer them, overlapping slightly, to create large, dimensional flowers. Paint them in bright colours and add details like glitter or sequins. Attach them to walls or use them as freestanding decorations.
- Cardboard Photo Booth: Construct a photo booth backdrop from large cardboard boxes. Decorate the exterior with paint, paper, or fabric. Cut out shapes or create a fun theme to match your party. This provides a unique and memorable photo opportunity for guests.
- Cardboard Cutouts: Cut out various shapes and figures from cardboard, such as stars, hearts, or party animals. Paint and decorate them, and use them to create a wall hanging, garland, or table scatter.
Plastic Bottles: Creative and Unexpected Decorations
Plastic bottles, often overlooked as recyclable waste, can be transformed into striking party decorations. Their shape and transparency offer unique possibilities for creative expression.
- Plastic Bottle Lanterns: Cut intricate designs into the sides of clear plastic bottles. Place battery-operated tea lights inside to create beautiful lanterns. Hang them from trees or ceilings for a magical outdoor or indoor effect.
- Plastic Bottle Wind Chimes: Cut the bottom off various sized plastic bottles. Decorate them with paint, beads, or other embellishments. String them together to create colourful and whimsical wind chimes for an outdoor party.
- Plastic Bottle Flower Pots: Cut the top off plastic bottles and decorate them with paint or fabric. Use them as small planters for herbs or flowers to add a touch of greenery to your party.
Creating a Repurposed Material Centerpiece
This example demonstrates how to create a visually appealing centerpiece using repurposed materials. This project combines elements of several previously discussed ideas.
Materials: Three glass jars of varying sizes, leftover fabric scraps (different colours and textures), artificial flowers, twine, small battery-operated tea lights.
Process:
- Clean and dry the glass jars.
- Wrap each jar with a different fabric scrap, securing it with twine.
- Arrange the jars in a triangular formation on a serving tray or decorative plate.
- Place artificial flowers of varying heights in each jar.
- Place a battery-operated tea light inside each jar to create a soft glow.
This centerpiece provides a charming and eco-friendly focal point for your party table. The combination of textures and colours creates visual interest, while the soft glow of the tea lights enhances the ambiance.
Tips for Transforming Everyday Items
Transforming everyday items into unique party decorations requires creativity and resourcefulness. Consider these tips:
- Think outside the box: Don’t limit yourself to traditional craft supplies. Explore your home for potential materials. Old magazines, newspapers, buttons, and even bottle caps can become decorative elements.
- Embrace imperfection: Handcrafted decorations don’t need to be perfect. Embrace the imperfections and unique character of your recycled materials.
- Add personal touches: Incorporate your own style and personality into your decorations. Add photos, handwritten messages, or other personal items to make them truly unique.
- Coordinate with your theme: Choose materials and colours that complement your party theme.
- Experiment with different techniques: Try painting, decoupage, gluing, and other craft techniques to enhance your creations.
ENTERTAINING
DIY party decorations aren’t just about visual appeal; they play a crucial role in setting the overall mood and ambiance of your event. By thoughtfully incorporating DIY lighting, color palettes, and thematic elements, you can transform a simple gathering into a truly memorable celebration. The right atmosphere can significantly enhance the enjoyment of your guests and create lasting positive impressions.Creating a festive atmosphere hinges on effectively utilizing lighting and color schemes to complement your party’s theme.
Careful consideration of these elements allows you to evoke specific emotions and guide the flow of the event, from a relaxed and intimate gathering to a vibrant and energetic party.
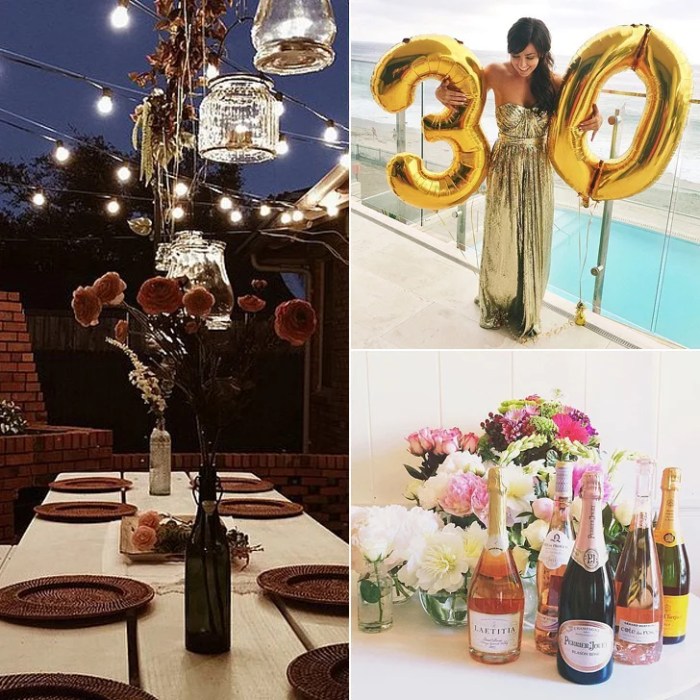
DIY Lighting Solutions for Festive Ambiance
Strategic lighting dramatically impacts the mood. Dim, warm lighting fosters intimacy, while bright, colorful lights create a lively atmosphere. DIY options abound, offering both cost-effectiveness and creative control. For instance, mason jars filled with fairy lights create a rustic charm, perfect for a garden party. String lights draped across walls or ceilings add a magical touch, while strategically placed lanterns provide a warm, inviting glow.
Paper lanterns in various colors and sizes can be hung at different heights to add depth and visual interest. Consider using colored bulbs or gels to subtly alter the light’s hue, matching your chosen color palette.
Color Palettes and Themes to Enhance Party Atmosphere
The colors you choose significantly influence the atmosphere. Warm colors like reds, oranges, and yellows evoke feelings of warmth, energy, and excitement, ideal for lively celebrations. Cool colors such as blues, greens, and purples create a more serene and calming ambiance, perfect for more relaxed gatherings. A cohesive color palette, tied to a specific theme, helps unify the decorations and strengthens the overall aesthetic impact.
For example, a tropical-themed party might use vibrant greens, yellows, and oranges, while a rustic-chic party might incorporate muted browns, creams, and greens. Consider using a color wheel to find complementary and analogous colors that work harmoniously together.
Step-by-Step Guide to Creating a Visually Appealing Party Space
Creating a visually appealing space involves a structured approach. First, define your party’s theme and choose a corresponding color palette. Next, select DIY decorations that align with your theme and color scheme. This might involve crafting paper flowers, creating balloon arches, or designing personalized banners. Then, plan the layout of your party space, considering the placement of furniture, decorations, and lighting.
Begin by setting the foundation with tablecloths, centerpieces, and backdrops. Then, strategically incorporate your DIY decorations, layering them to create visual depth and interest. Finally, adjust the lighting to complement your chosen decorations and overall atmosphere. For example, for a birthday party with a superhero theme, you could create a backdrop using fabric and paint, add superhero cutouts, and use string lights with blue and red bulbs.
This systematic approach ensures a cohesive and visually stunning party space.
Tips for Success with DIY Party Decorations
Creating stunning DIY party decorations can be a rewarding experience, transforming a simple gathering into a memorable event. However, success hinges on careful planning, efficient execution, and proactive problem-solving. By following a structured approach and anticipating potential challenges, you can avoid stress and ensure your decorations enhance, rather than detract from, your party’s atmosphere.
A Checklist for Successful DIY Decoration Projects
A well-defined checklist ensures a smooth and efficient process, minimizing the risk of overlooking crucial steps. This structured approach allows for better time management and reduces the likelihood of last-minute panics.
- Concept & Design: Finalize your party theme and develop a detailed design plan, including color schemes, materials, and placement of decorations. Sketching your ideas can be beneficial.
- Gather Materials & Tools: Create a comprehensive list of all necessary materials and tools. Purchase or gather everything well in advance to avoid delays.
- Prepare Workspace: Designate a clean and spacious area for crafting. Ensure adequate lighting and ventilation.
- Time Allocation: Estimate the time required for each step of the project and create a realistic timeline. Build in buffer time for unexpected delays.
- Execution & Assembly: Follow your plan meticulously, focusing on one task at a time. Take breaks to avoid fatigue and maintain focus.
- Quality Check: Before the party, thoroughly inspect all decorations for any flaws or imperfections. Make necessary repairs or adjustments.
- Installation: Carefully install decorations according to your plan, ensuring they are securely placed and aesthetically pleasing.
Planning and Organizing Your DIY Project
Effective planning is crucial for a stress-free DIY experience. Thorough preparation minimizes the chances of encountering unexpected problems during the actual execution phase.
For example, consider a birthday party with a superhero theme. Planning should include deciding on specific superheroes, sourcing appropriate colors (blues, reds, yellows), selecting materials like felt, cardstock, or balloons, and determining the layout of the decorations (banners, cutouts, table centerpieces). Creating a visual timeline with specific tasks assigned to each day leading up to the party ensures a well-coordinated effort.
Troubleshooting Common DIY Decoration Issues
Even with careful planning, unforeseen issues can arise. Being prepared for common problems will minimize disruption and ensure the project stays on track.
For instance, if you’re working with balloons and some refuse to inflate, check the valve mechanism and ensure you’re using a suitable pump or compressed air. If glue doesn’t adhere properly, try a different adhesive or ensure the surfaces are clean and dry. If a craft project requires intricate cutting, use sharp scissors or a craft knife for precision.
Remember that having backup materials on hand is always a wise precaution.
Creating DIY decorations for your parties doesn’t just save money; it allows you to inject personality and creativity into your celebrations. By exploring various materials, techniques, and themes, you can transform any event into a reflection of your unique style. From simple, budget-friendly projects to more elaborate creations, the possibilities are limitless. Remember to plan ahead, gather your materials, and most importantly, have fun bringing your vision to life! The joy of creating and the personal touch you add will undoubtedly enhance the overall party experience.
Questions Often Asked
How far in advance should I start my DIY decorations?
It depends on the complexity of the projects. Start at least 2-4 weeks before the party to allow ample time for crafting and avoid last-minute stress.
What if I make a mistake during a DIY project?
Don’t worry! DIY is about experimentation. Embrace imperfections; they often add character. If a significant error occurs, consider repurposing the materials or starting over with a simpler design.
Where can I find inspiration for DIY party decorations?
Pinterest, Instagram, and craft blogs are excellent resources for discovering creative ideas and tutorials. Look for themes and styles that resonate with your party’s overall vision.
How can I store my DIY decorations after the party?
Proper storage extends the life of your decorations. Clean them gently, let them dry completely, and store them in airtight containers or labeled boxes to protect them from dust and damage.